Customizing a wooden frame using sheets from a floral paper pack.
I customized a $0.99 USD unfinished wood picture frame using sheets from a floral paper pack.
In case it's helpful, below are the topics covered in this post:
Supplies and Stuff

These are the items I used to customize this wooden frame:
Unfinished wood frame
Paper cutter
Decorative pattern paper
Decoupage glue
Paint brush
Scraper
Craft knife
Metallic paint
Metallic marker
Glossy varnish
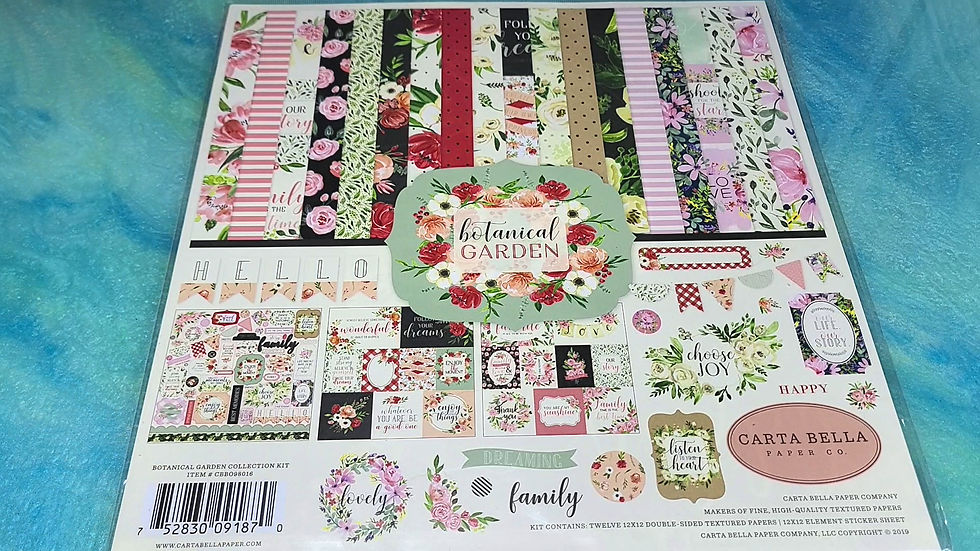
I specifically used sheets from the Botanical Garden paper pack from the Carta Bella Paper Co. This project could be completed with sheets from other products or sources.
Prepping the Frame and Sheets

I bought the unfinished wood frame from my local Michaels craft store for $0.99 USD. It's cheap, but good quality.

The edges were a little rough and needed sanding. There was some chipping on the inside edges, but otherwise the front surface was smooth and blemish free.

I cut out a small "Choose Joy" text design from the paper pack. It was a perfect fit within the 4 inches by 6 inches wood frame.

I then selected a light pattern sheet that contrasted the text design's dark background. I didn't want the frame to look plain, but I also didn't want it to clash with the text design in the center.
Customizing the Frame
I applied a thick coat of decoupage glue with a paint brush over the front of the frame. Perhaps any strong glue or permanent tape adhesive would work, but I happen to have decoupage glue that I only bought on sale years ago (it's not cheap).
Simple Tip: If you use a paint brush or foam brush for decoupage glue applications, you may be able to salvage and reuse the brush if you wash it immediately. I recommend having a few brushes of different sizes dedicated to glue use as the bristles/foam would deteriorate over time. The good news is that you won't lose any bristles if you use a cheap paint brush!

I used a scraper to burnish the paper onto the frame. This helped eliminate wrinkles and bubbles formed underneath due to globs of glue or air pockets. In other words, burnishing ensured a smooth surface as the glue dried.
After several minutes, I used my craft knife to cut along the edges and remove the excess paper. I had to wipe glue off the craft knife blade periodically since I didn't wait for the glue to dry completely.
I painted the sides, edges, and back of the frame with rose gold metallic acrylic paint. I chose rose gold color blindly. I didn't pay attention to which paint bottle I grabbed before I started. Originally, I thought a lighter color would've looked best for the design.

On the front of the frame, I struggled to paint a straight line to create a trim around the edges. I used my rose gold metallic marker to draw a straighter line around the edges.
Adding a Protective Coat
I brushed a coat of glossy varnish over the entire frame. I could've used my decoupage glue as a final protective finish, but the varnish produced more shine than the glue. I wanted the frame to be shiny enough to figuratively blind anyone looking at it!
Simple Tip: If you use gouache instead of acrylic paints, I highly recommend using a spray varnish instead. Brush-on varnish will reactivate gouache paint, even if it's dried for several days, thus ruining the paint job. That's how I almost ruined my Holiday Wreath Cup last year.
My Thoughts
If you don't want to paint or engrave a wooden frame, decoupage is an easy way customize. Just be ready to get some glue on your fingers and/or tabletop surface.
It didn't cross my mind to add a protective coat to the text design at the time of recording my video (link at the top of this post). However, I've since applied a coat of decoupage glue over the front and back of the text design. Now it's ready to be gifted or donated to a thrift store.
I would recommend this simple project to someone who's lazy or needs a quick and cheap way to customize an otherwise plain frame.
What's Next?
I'm deciding on a design theme for my journal. With April being National Garden Month, I may go with a gardening theme. Check back next week to see if I ran with that idea.
How would you have decorated this frame? Comment below to share how you would've completed this project differently.
Don't forget to subscribe below to be notified by email when I post something new.
Thanks, and have a great day!
Simply Jelly Jam


Comments