Inkjet Image Transfer to Wood
- Simply Jelly Jam
- Jul 12, 2022
- 4 min read
Trying to transfer an image printout onto wood for the first time.
I recently attempted to transfer an inkjet printed image onto wood. My first attempt was not perfect, but I do not consider it a failure either.
In case it's helpful, below are the topics covered in this post:
Prepping an Image
I wanted to test my inkjet image transfer using an old photograph I took of Hershey's Chocolate World in Las Vegas, Nevada.
I opened the image in a photo editing program, increased the saturation, and flipped the image horizontally.
It is important to flip the image before printing, especially if it contains text. The image will be inverted during the application step and cannot be fixed afterwards.
Printing an Image

I printed my image with an inkjet printer on generic printer paper. I heard that a LaserJet printer is best for image transfers onto wood or other surfaces, but I only have my old Epson Artisan inkjet printer.

I wanted to see for myself how well or poorly the transfer process was with a printer many do not recommend for this.
Prepping the Wood Surface

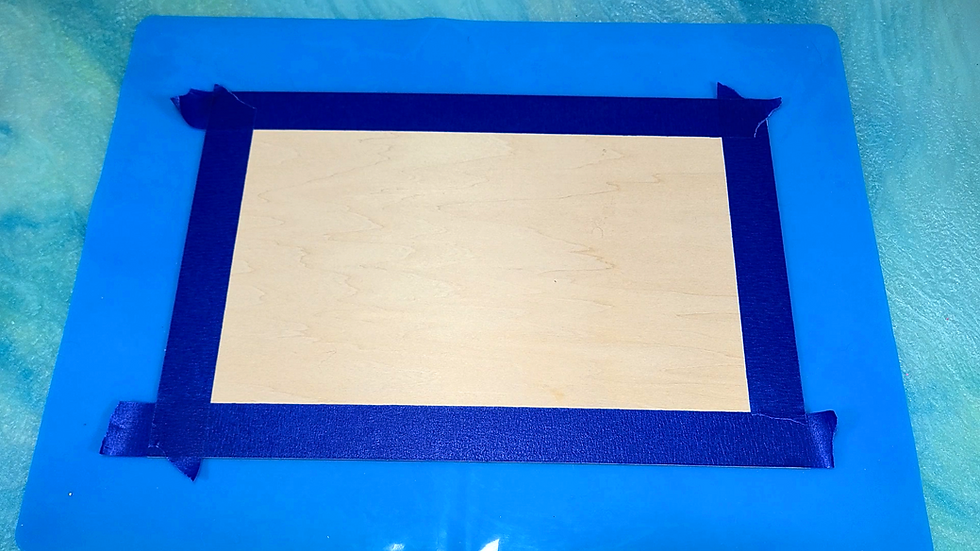
The basswood board I wanted to use was already smooth and did not need to be sanded. Instead, I masked the edges of the surface with painters’ tape to create a border for my image.
Masking is not necessary, but I did it because the printed image was smaller than the size of the wood board.
Applying the Image to Wood
I added a generous amount of decoupage glue to the wood board and brushed it evenly across the surface. Some people recommend matte over gloss, so I used my Mod Podge Paper glue with the matte finish.
I placed the printed image facing down onto the wood board. I first used a scraper to burnish the paper onto the surface. Later I found that using my finger was best to feel the lumpy areas I could not see. I made sure the paper was smooth over the wood board.
Drying Time
Many experienced artists and crafters recommend letting the glue set overnight before moving onto the next step. A few suggested letting it set for about four hours.
Personally, I did not expect my first time attempting this to be successful. I decided to experiment with less time - one-and-a-half hours to be exact.
Peeling the Paper
I set aside a small cup of water. I dipped a shop towel, something I knew would not dissolve quickly while wet, and gently applied it to the paper. I did not rub at this point. I just wanted to dampen the paper.
Once damp, I used my finger to rub a corner of the paper. I guess I was lucky that parts of the paper's top layer peeled off in large pieces. This made the peeling process shorter and easier for me.
Gentle rubbing is essential! There were a few areas where I accidentally applied a tad too much pressure to the paper resulting in bald spots in the image. Since this was my first attempt, I considered these errors lessons learned for the next time I try this.
When I removed much of the top layer of the paper that was not adhered onto the wood board, I went ahead and peeled off the masking tape. It resulted in a frayed, yet straight edge around the image.

In fact, after gently rubbing a while longer, I noticed there were many frayed, fuzzy fiber pieces on the image. After wiping, shaking, and lint rolling, the frayed, fuzzy fiber pieces remained on the surface. I have not seen this in any of the videos I watched, so I assumed this is the result of not letting the glue set longer.
Protective Top Coat

I applied a coat of decoupage glue over the image. This removed much of the frayed, fuzzy fiber pieces I could not get rid of otherwise.
My Thoughts

I thought my first attempt, seeing as how I have never tried an image transfer before, would be a failure. To my surprise, it was as easy as others made it out to be.
I made a few errors during the peeling step where I rubbed off parts of the image. I considered this a lesson learned and know not to make the same mistake next time. Gentle rubbing is all that is needed to remove the excess paper not adhered onto the surface.
Will I try this again? Absolutely! I want to combine an image transfer onto wood with laser engraved text and images. More specifically, I would like to engrave a pet's name above or below a transferred image of the pet onto wood. That could make for a unique gift to the pet owner.
What's Next?
While I want to try this again, I may wait until my Prime Day sale items arrive. Check back to see how I attempt this again or what fun artsy items I bought during Prime Day 2022!
Comment below to share tips for a more successful image transfer using an inkjet printout.
Don't forget to subscribe below to be notified by email when I post something new.
Thanks, and have a great day!
Simply Jelly Jam


Comments