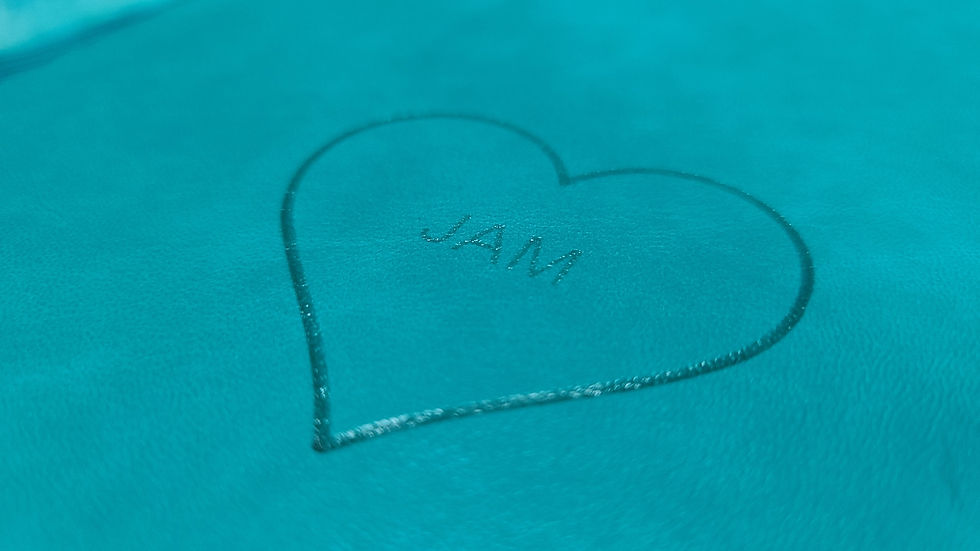
Laser Engraved PU Leather Journal Cover
- Simply Jelly Jam

- Jul 14, 2022
- 3 min read
A light engraving attempt.
I laser engraved a simple, custom design onto a journal cover made of PU leather. While this was my second time engraving a cover, it was my first time engraving this type of material. The result was light, but not bad.
In case it's helpful, below are the topics covered in this post:
Test on the Back Cover
I replicated the steps I took with my first Laser Engraved Sketchbook Cover starting with a test on the back cover.

I uploaded a simple heart shaped image from the NEJE app image library. I then added my initials using Arial font in the center of the heart. Keeping this simple design small in size made for a quick fifteen-minute engraving.
I used the following settings in the NEJE app:
Laser brightness: 50%
Sensitivity of tilt detection: medium
Motor speed: medium
Laser power: 15%
Burn time: 15mS
Total passes: 1
These were the settings I used to previously engrave a hardcover sketchbook. I thought this was a good starting point since I have never engraved a PU artificial leather journal cover before. This test would let me know if I needed to adjust the settings before engraving the front cover.

I used the positioning features in the NEJE app to determine where to place the journal under the laser module. I put on my laser goggles to adjust the focus of the laser light. The smaller the pin light, the more accurate the engraving would be.
I opened my garage door for air flow. Laser engraving emits an odor that triggers my migraine if I do not have great ventilation.
The engraving went well, or so it seemed under the bright lighting of my garage. The engraving was dark with the letters for my initial appearing slightly lighter. Because of this, I figured the settings were good to use for the front cover.
Engraving a Design

I created a simple design and saved it as a PNG file. The NEJE app will load other file formats including SVG and JPG, but I am used to saving most of my digital art as PNG files.
I started a new engraving using the same settings for the back cover. It took a total of two hours for one pass.

Towards the end of the first pass, I realized the engraving was significantly lighter than the smaller design engraved onto the back cover. I modified the settings to include a second pass with hopes that the engraving would darken. Unfortunately, it did not darken as I hoped.
My Thoughts

The settings I used, while too high for a hardcover book, was too light for a softer PU artificial leather book. The engraving was too light for my liking.

However, it only appeared light when I viewed it from the top down. The engraving was easy to see when I changed my viewing angle. Since I rarely look at the cover while standing over it, I did not consider this attempt a failure.

I want to try this again with modified settings. While I could continue using this journal's covers for testing purposes, I decided to search for an older journal covered with PU artificial leather to use. I do not want to ruin this current cover since I am actively using the book as a bullet journal.
What's Next?
I am waiting for my Prime Day delivery to come soon. Check back another day to see what new arts and crafts I share next!
Have you engraved a PU leather book cover? Comment below to share your experience and tips.
Don't forget to subscribe below to be notified by email when I post something new.
Thanks, and have a great day!
Simply Jelly Jam


Comments