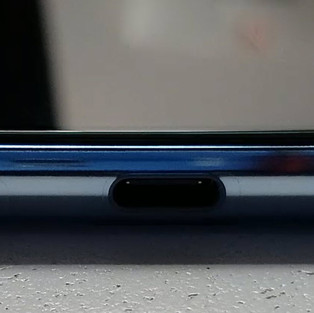
Testing the tempered glass screen protector and fingerprint sensor.
Recently, I received the Nano Optics tempered glass screen protector as a gift. I wanted to replace the factory installed screen protector on my S20+ with something sturdier. I applied this screen protector on my phone and tested the fingerprint sensor. Continue reading to see the issues I encountered and my final thoughts.
In case it's helpful, below are the topics I cover in this post:
Nano Optics Package (included instructions and contents)
First Attempt (failed)
A Decent Application (minor issues)
Detailed Steps in a Numbered List (14 total)
Tips for Application (11 total)
Trying the Fingerprint Sensor (Success!)
My Thoughts (Spoiler: the package was NOT for an S20+)
NOTE: Edited 05/28/2020 to correct minor grammatical errors and a bulleted list of topics covered in this post.
Nano Optics Package

The first thing I noticed was the inconsistency on the front of the box. The sticker says "Galaxy S20 Plus Screen...ase Friendly][2 Pack] New." However, the box displayed the number "9" and a picture of the front and back of a Samsung Note 9 phone.
I knew my Dad (supposedly) did a lot of research on this product before purchasing it off Amazon. He told me about this gift before it arrived, so I watched a few YouTube videos on how to apply it properly.

I'm glad I watched the videos because there were no detailed instructions. The back of the box illustrated 4 steps: clean the screen, apply the adhesive down the center of the screen, place the screen protector on top, and use the included "nanoscale [UV] light" over the screen and screen protector.
The 4 steps illustrated on the back of the box were the basic steps required for complete application of this screen protector. However, there's a bit more that needs to be done, especially for a S20 that has a huge camera projecting off the back of the phone and keeping it from being level. I'll go over a bit more about that later in this post.

The box contents included:
1 "nanoscale light" (UV light)
2 tubes of adhesive
2 screen protectors
2 "Screen protector accessories" packs
The "Screen protector accessories" pack included:
2 guide stickers
1 "dust-absorber" sticker
1 "alcohol prep pad" (wet wipe)
1 mini microfiber cloth
Not included:
USB-C cable for the "nanoscale light"
First Attempt
I first peeled off the factory installed screen protector on my S20+. When I got my new phone, I liked that it came with a screen protector already installed. Within a few days of having my S20+, the screen protector scratched easily. It wasn't until I peeled it off that I realized how thin and flimsy the pre-installed screen protector was.

Having crafted with resin, I knew a level surface was important. The camera on the back of the phone prevented it from lying flat or level on a tabletop or other surface. I folded some paper scraps, placed it under the phone, and used a level to determine if I needed to adjust the paper scraps I used.

I verified the phone was level longways across my DIY dropleaf tabletop. Unfortunately, I didn't realize my tabletop sloped towards my lap. After I poured the adhesive on the phone's screen, the adhesive quickly ran off the side onto the tabletop. Fortunately, the sticky adhesive wiped off my phone well with an antibacterial wipe.
A Decent Application

Once I cleaned the adhesive off my phone and tabletop, I checked the levels again. This time I checked from side-to-side and front-to-back.
I cleaned the phone screen again with an antibacterial wipe and microfiber cloth. I cut the tip off the adhesive tube. Even though the tube faced upwards when I made the cut, some of the adhesive splattered from the force of the dull scissors cutting the tube.
Some specks of adhesive got onto the phone's screen, but I ignored it. I figured it wasn't a problem. After I completed the application, I noticed those specks became what appeared to be tiny air pockets under the screen protector. It's not noticeable when the screen's on, but it's noticeable when the phone's asleep.

I held the adhesive tube over the phone's screen and twisted the opposite end of the tube to release the adhesive. I poured the adhesive over the center of the phone's screen as illustrated on the back of the box. I peeled the film labeled "back" off the screen protector, and then I gently placed the peeled side of the screen protector over my phone's screen.
I never pressed down on the screen protector, but I gently placed my fingers on the edge to keep the screen protector from sliding out of place while the adhesive spread on its own. I waited a couple minutes for the adhesive to spread and completely fill the underside of the screen protector.

I ran a Q-Tip along the edges to cleanup any run off. I noticed that doing so spread the adhesive into the tiny gaps where the adhesive didn't reach initially. The screen protector appeared flushed onto the phone's screen (no gaps).

I briefly experienced a dumb moment when it came time to cure the adhesive. I didn't realize the "nanoscale light" required a USB-C and couldn't figure out why my micro USB wouldn't fit. Instead, I grabbed my own UV flashlight. I ran the light over the screen and along the edges for about 3 minutes.
Detailed Steps in a Numbered List
Below are the many, simple steps I believe would've made my application of the Nano Optics tempered glass screen protector more successful. Hopefully, you'll find them helpful if you choose to use this or a similar product.
Unbox and open a "Screen protector accessories" pack.
Ensure the phone screen's surface is level front-to-back and side-to-side on a flat surface.
Clean the screen with an alcohol wipe.
Dry the screen with a microfiber cloth.
Use the "dust-absorber" to grab dust speckles.
Cut off the tip of the adhesive.
Twist the opposite end of the adhesive tube over the phone's screen.
Pour the adhesive down the center of the phone's screen.
Peel the back of the screen protector.
Gently place the 'peeled' side of the screen protector on the phone's screen.
Wait the minute or 2 for the adhesive to spread on its own under the screen protector.
Cleanup any adhesive run off.
Run the UV light over the screen and along the edges for about 3 minutes to ensure the adhesive is fully cured.
Ensure your phone's touch sensitivity is enabled for better touch screen accuracy.
Tips for Application
Below are some tips I learned from other sources and from my own experience:
Use a leveling tool to verify the tabletop and phone screen's surface won't cause the adhesive to run off the screen when applied.
If you don't have a leveling tool, consider placing a ball or other round object on the tabletop surface to determine if it's level enough to work on.
If you have sensitive skin, try to avoid touching the adhesive. Wash it off immediately if you're concerned about a potential allergic reaction.
Cut the tip of the adhesive tube faced up to minimize potential splatter.
Cleanup any adhesive splatter on the phone's screen to prevent air pockets from developing under the screen protector.
Gently place the screen protector over the phone's screen.
DO NOT press down on the screen protector. It'll cause the adhesive to run off the sides of the phone and weaken its adherence to the phone's screen.
Wait until the adhesive completely fills the underside of the screen protector before handling or curing. This may take a few minutes.
If the adhesive doesn't completely reach an edge of the screen protector, gently lift the edge of the screen protector and release until the adhesive continues its spread.
Use a cotton swab along the edges to clean up any adhesive run off and fill in any gaps between the phone's screen and the screen protector.
Run the UV light over the entire top and edges of the screen for 3 minutes at least to ensure the adhesive cures completely.
Trying the Fingerprint Sensor
I've never used the fingerprint sensor to unlock this or a previous phone before. I wasn't convinced I'd be able to after this application. Before I tried to add my fingerprint, I went to Settings > Display > Touch Sensitivity to increase the touch screen accuracy on my phone. I probably should've done this before I applied the screen protector, but it didn't cross my mind at the time.
I went back to Settings > Biometrics and Security > Fingerprints to begin adding my fingerprint. Technically, I used my thumbprint during this setup. I didn't know this setup was going to take a decent amount of time to do, but I was pleased when it worked in the end. I added a couple more thumbprints of different angles for a faster unlocking of my phone.
My Thoughts
I encountered a few challenges. I wasted a tube of adhesive when I failed to check the level of my phone screen's surface front-to-back and side-to-side. I have a second screen protector, but I don't think I'd be able to use that in the future.
I think because I didn't clean up the adhesive splatter when I cut the tip off the tube, it now looks like there are tiny air pockets under my screen protector. It's only noticeable when my screen is off or asleep, but I imagine it'd annoy a perfectionist or someone with OCD.
The product was designed for a Samsung Note 9, NOT a "Galaxy S20 Plus" as the sticker and receipt says. There should've been a small cutout for the camera, but the screen protector covered the pinhole. The screen protector didn't cover the entire screen because it was designed for the smaller screen real estate of a Note 9, NOT a Galaxy S20+.
Despite the challenges and the incomplete screen coverage, the tempered glass is thick and sturdy. I haven't encountered any inaccuracies or delays with using the phone's touch screen. I really like the accuracy and timeliness of the fingerprint scanner considering how much thicker the protector made the screen.
I don't foresee the screen getting scratched or cracked easily or anytime soon. Of course, I don't have any intentions to test its durability by dropping my phone or taking a craft knife to the screen any time soon. You'll have to watch a YouTuber like JerryRigEverything to see how that works out.
Overall, I'm happy with the screen protector. It's not coming off until it must.
What's Next?
I have new Posca paint markers and a few phone cases that I'll customize soon. Hopefully the phone cases will fit over the raised screen of my S20+.
Have you used Nano Optics or similar tempered glass screen protector? Login and Sign up to share your review and reflection of your phone's screen protector. I'd like to know!
Don't forget to subscribe below to be notified by email when I post something new.
Thanks, and have a great day!
Simply Jelly Jam


Comments