Polymer Clay Bumblebee
- Simply Jelly Jam

- Feb 8, 2022
- 4 min read
Small clay figures to hide in future gift packages for family and friends.
I sometimes like to hide fake insects in gift packages I'll give to family and friends this year for my own amusement. Recently, I made small polymer clay bumblebees. One day I'll make other polymer clay insects including roaches and spiders. At least I'll enjoy these little bugs!
Making the Bumblebee
I used Original Sculpey polymer clay for this insect. This could also be created with air-dry clay if preferred.
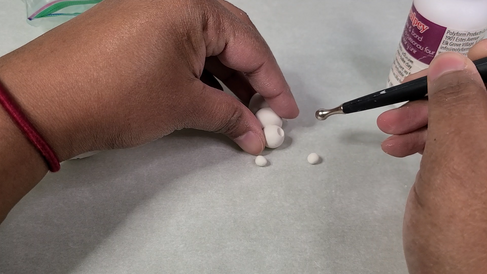
I kneaded the clay with my hand and rolled three balls to make a small, medium, and large size. I then rolled two even smaller sized balls for the eyes. I shaped the largest ball of polymer clay with a slight point on one end to resemble an online image I referenced for creating this craft project.

I used a ball stylus to indent one end of the large sized ball of polymer clay. I filled the indentation with clay adhesive and firmly pressed the medium sized ball of polymer clay into it. This made up the main body of the bumblebee.

The clay adhesive ensures the separate pieces don't easily break apart while sculpting or long after it's baked into a solid figure. I could've also used a toothpick or wire to ensure the separate pieces remained intact.

I repeated the steps to adhere the small sized ball of polymer clay to the main body of the bumblebee. As you may have guessed, the small sized ball of polymer clay made up the head of the bumblebee.
On the head, I made two indentations and filled them with clay adhesive. I pressed the two smaller sized balls of polymer clay into the indentations for the eyes of the bumblebee.
I used a couple needle nose pliers to trim some metal eye pins for the legs and antennas of the bumble bee. Only one needle nose plier was necessary, but I found that using two made trimming and bending the small metal pin pieces easier for me. I trimmed eight pieces total with two being shorter than the rest.

Before I attached the bended metal pins, I used a shaping tool to mimic the furry, fuzzy texture of a real bumblebee. I also made two slits to slide wings into later.

I pressed the metal pin pieces into place and baked the polymer clay bumblebee. With polymer clay, baking hardens the clay to become a solid piece.
Painting and Making Wings
Before I painted the bumblebee and made wings, I adjusted the metal pins. I secured the metal pins. If I skipped this step, the metal pins would shift and come out with handling. I wanted these to be a permanent fixture on the bumblebee.
I used acrylic paints to paint the bumblebee. I ignored the reference image at this point and painted the piece the way I preferred: with stripes of yellow and black with white at the tip where the stinger would be.
I also painted the metal pin pieces. I don't know if these will remain painted considering the slick surface of the metal, but I gave it a go anyway.

The wings gave me some pause. I originally wanted to make it out of UV resin, but I couldn’t get the shape the way I wanted. Instead, I used translucent vellum to create the wings.
I placed the vellum over a smart phone with the reference image and traced the wings with a pencil. I cut out the shapes and erased the pencil mark.
I colored the wings with stamp ink and a blending tool. I then drew the veins with a brown pen. I adhered the wings into the slits with super glue. I propped the wings up with bottle caps and let the glue dry completely.
After the paint and glue completely dried, I applied a coat of varnish over the polymer clay bumblebee. I once tried applying varnish on vellum, but the vellum curled significantly.
My Thoughts
Overall, the polymer clay bumblebee turned out OK. The vellum wings don't seem to match the figure, but it's good enough for me.
There were three things I intended to do but didn't follow through with. First, I intended to wrap the metal pin pieces with clay. A bumblebee's legs are thicker than the pins by themselves. The legs and antennas also have texture that I couldn't replicate on just the metal pins.
Unfortunately, I struggled to add clay around the metal pin pieces without it looking 'wonky,' so I decided to leave this alone.
Second, I intended to make the wings from UV resin. As I mentioned earlier, I was unable to get the shape of the wings the way I wanted them to turn out. I don't know if it's because of the small size I was aiming for or my lack of experience working with resin, but I was unable to make resin wings for this craft project.
Lastly, I intended to use 3D fabric paint to add additional textures to the bumblebee. At the very least, I wanted to add a tongue and stinger. Sadly, I forgot all about it. Fortunately, it's an easy addition for later.
What's Next?
I want to make many more polymer clay bumblebees. Eventually, I'll hide them in gift packages for family and friends. If I'm lucky, I'll get a good laugh from their reactions.
Have any suggestions for improvements? Login and Sign up to share tips for improvement and how you would've done this differently.
Don't forget to subscribe below to be notified by email when I post something new.
Thanks, and have a great day!
Simply Jelly Jam


Comments