Pumpkin Napkin Decoupage on Glass Bottle
- Simply Jelly Jam

- Nov 22, 2022
- 4 min read
Easy home decor idea.
I used decoupage glue (Mod Podge) to adhere a pumpkin fall/autumn napkin onto an empty drink glass bottle.
In case it's helpful, below are the topics covered in this post:
Prepping the Napkin and Bottle

I used Pumpkins Guest Napkins by Celebrate It from my local Michaels store. Any decorative napkin should work for this craft project.

Some napkins have multiple layers that should be separated. I had a 2-ply napkin that I peeled apart.

I cut the printed part of the napkin down to a more manageable size for the project.
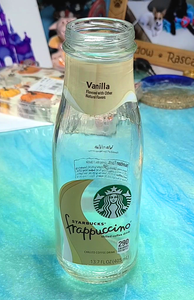
After washing a glass drink bottle, I removed the labels. It left a sticky residue, but I did not worry about it since I was going to apply glue soon enough.

I cleaned the bottle with isopropyl alcohol to remove unwanted dust or lint particles. This removed some of the sticky residue but cleaning away particles was my primary focus for this step.
I let the bottle dry completely before continuing to the next step.
Decoupage with Mod Podge

Decoupage glue is great for some craft projects as it may be used as a glue and varnish. I primarily use Mod Podge brand decoupage glue for projects where I want to adhere paper onto another surface.

I brushed on a few strokes of glue from the neck of the bottle to the bottom. Working in sections makes it easier to ensure the napkin adheres to the bottle completely.
Brush tip: Use a paintbrush or foam brush you do not mind ruining with glue. If you wash the brush well immediately after use for a decoupage project, you may be able to reuse it again for a future project. Consider it your dedicated glue brush.
I did not care about wrinkles but working in sections is the best way to flatten and smooth the napkin if you wanted to avoid the wrinkles. You would have plenty of time to press away wrinkles and bubbles while the glue was wet without the fear of the glue drying before you were ready to continue onto another section.
With a few strokes of glue brushed onto the bottle, I carefully positioned and placed the napkin onto it. I used my fingers to burnish the paper well onto the glued surface.
I repeated the steps of adhering the napkin to the bottle until I covered the sides entirely. I cut off the excess napkin and adhered the edge of the napkin to the bottle.
Part of the napkin covered and exceeded the threads at the top of the bottle. I left this alone knowing I would cut it later when the glue dried.
Some crafters recommend letting the glue underneath the napkin dry completely before varnishing with more glue. In this case, you would want to wait an hour or two before varnishing. Waiting would eliminate any chances of the napkin tearing if you brushed roughly while it was saturated underneath.

I am impatient and immediately applied glue to the outer surface of the napkin. I brushed gently to minimize my chances of tearing the saturated napkin. Luckily, I did not have to address any unwanted tears.
I especially made sure to brush on glue along the napkin's edge along the bottom of the bottle. I used a finger or thumb to press the napkin against the bottle to eliminate air pockets. Air pockets, once dried, could result in the napkin tearing or peeling with handling.

There were many wrinkles since I did not put in the effort to flatten and smooth the napkin better. After I applied glue to the outer surface, I used a finger or thumb to gently press down the wrinkles. I did not use my palm or a burnishing tool with fear of tearing the napkin.
I let the glue dry for an hour before using a craft knife to cut off the excess below the ring of the bottle. I recommend letting it dry for two hours if you want to cleanly cut off any excess napkin. I knew I wanted to add jute cord around the threads of the bottle top, so I was not concerned about a clean, sharp cut.
Adding Jute Cord and Ribbon

I used a hot glue gun to adhere jute cord from below the neck ring and over the finish (top) of the bottle. Doing so added another visual element to the decoupaged bottle and masked the uneven cut I did with the craft knife.
I considered adhering jute cord at the bottom of the bottle, but I was satisfied with having the jute cord at the top on its own.

To add a little shine, I used the hot glue gun to adhere a glitter ribbon below the bottom of jute cord wrap. The shine does not show well in the photos, but it looks good in person!

I added fake floral in the bottle to use as a simple home decor item on my computer desk.
What's Next?
Have a spare decorative napkin you want to use for a craft project? Go ahead and decoupage it onto something you can reuse! A bottle, shoe box, or something else you do not mind applying glue to is a good way to complete your own decoupage napkin project.
Comment below to share what item you would use for a napkin decoupage project. For example, would you have used the pumpkin napkin on a serving tray, art case, or piece of furniture? Share your ideas!
Don't forget to subscribe below to be notified by email when I post something new.
Thanks, and have a great day!
Simply Jelly Jam


Comments