Shiny Notebook Recover
- Simply Jelly Jam
- Aug 10, 2021
- 3 min read
Customizing a notebook cover with scrapbook paper.
I wanted to motivate myself to do something simple and fun after over a week full of stressful life challenges. Recovering a $1 Composition Notebook with sheets from a scrapbook paper pad seemed like a great way to distract myself from reality for a short while.
Supplies and Stuff
These are the items I used to recover and customize this boring notebook:
Composition notebook
"Deep Blossoms" Hot Buy Paper Pad
Double-sided permanent tape
Scissors
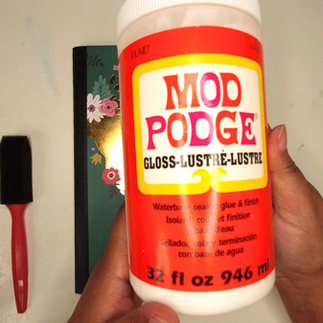
Mod Podge
Foam brush
Parchment paper
If you're trying to do this at home, you don't have to have the exact paper pad I used. Use whatever scrapbook paper, pattern paper, gift wrapping paper, etc. that you have available and want to use.
I used double-sided permanent tape to adhere the paper to the cover, but this could easily be done with glue.
While I used Mod Podge brand to protect the covers, any decoupage glue would work. When I was younger and decorating notebook covers for my class subjects, I'd use packing tape to protect my customized covers.
The parchment paper was used to keep glue from getting onto the pages within the notebook. Any regular paper would work as well.
Recovering the Covers
I selected a few sheets from my "Deep Blossoms" Hot Buy paper pad I bought from Michaels long ago. Michaels sometimes has a sale on the CraftSmart Hot Buy paper pads that I can't resist. I liked these sheets because they're typically thick with many different pattern designs per pad.

I ran my double-sided permanent tape runner along the edges and center of the front cover. I could've used glue instead of tape, but I didn't want to worry about the paper warping at this point.
I lined the top edge of the pattern paper with the top edge of the front cover. Once it felt like the edges were aligned well, I pressed the paper over the cover with the palm of my hands.

I used scissors to cut off the excess paper along the edges of the cover. I held on to the scrap paper since it could be used for other, smaller papercraft projects.
I then repeated the steps to recover the back cover.
Adding Embellishments
There were a couple small designs from the paper pad I wanted to include somewhere on or in the notebook.
I adhered one of the designs to the bottom center of the back cover with tape. The quote on the design read, "The World Belongs To Those Who Dream." I do spend a lot of time dreaming. I just need to act on my dreams to turn them into reality.
I adhered a smaller design to the inside of the front cover. The quote on the design read, "Happiness Blooms From Within." Sometimes happiness is hard to find, but some simple things in life can make it shine through.
Protecting the Covers
I used a foam brush to apply a couple coats of Mod Podge, a decoupage glue, to both covers. I started with the front cover and let it sit for an hour before working on the back cover.
While I placed parchment paper between the covers and first/last pages of the notebook, I still got some glue around the edges of the inner covers. Fortunately, I didn't get any glue onto the lined pages within the notebook.
Peeling the glue after it dried tore some of the cover. If you have washi-like tape, you may want to give those a try in case it works better than what I got using parchment paper.
My Thoughts
Motivating myself to do something fun or creative was challenging, but I'm glad I took the time to do this simple project.
Most of the time was spent waiting for the glue to dry. Otherwise, it didn't take longer than a half hour to recover this notebook. It probably didn't even take that long since I'd walk away periodically to address my home's current plumbing problem.
If you're looking to recover a notebook for school or work, I'd recommend customizing the covers to add your own personal flair to it!
What's Next?
If you're looking to recover a notebook for school or work, I'd recommend customizing the covers to add your own personal flair to it!
Do you use scrapbook paper for craft projects other than scrapbooking? Login and Sign up to share how you use such paper pads for your creative projects.
Don't forget to subscribe below to be notified by email when I post something new.
Thanks, and have a great day!
Simply Jelly Jam


Comments