Making a greeting card for Thanksgiving Day.
I wanted to make a "thanks" greeting card to give on Thanksgiving Day. I used an embossed sheet from a Hot Buy paper pack I bought from Michaels a couple months ago to decorate a card and the inside of an envelope.
Continue reading to see the steps I took to create a "Thanks" greeting card.
Supplies and Stuff


These are the items I used to create my card:
Paper trimmer and score tool. I used a paper trimmer to measure, cut, and score the paper. A simple pair of scissors and a ruler will do the same if you want to try this at home. You also don't need a score tool. A simple fold of the cut paper in half will do the job. Then use your finger or some other tool, like the scissors' handle, to flatten the fold if preferred.
Cardstock paper. I used sheets of solid brown and beige cardstock paper.
Pattern paper sheets. I used a couple sheets from a Fall Embossed Hot Buy paper pad from Michael's.
Stamps and stamp ink. I used a couple stamp ink colors and sentiments (cling and wooden stamps) inside the card and outside the envelope.
Double-sided tape. I used a permanent double-sided tape runner to adhere the different pieces of paper onto the cards and envelopes. I also used permanent double-sided tear tape on the envelope flap for Card #2.
Envelope. I had a business-sized envelope I wanted to make a card to fit within.
Scissors. I used scissors to trim excess paper around the edges of the cards and envelope flaps.
Measure, Cut, and Score the Card Base
I knew I wanted to use a 6-1/4" business envelope for the card I made, and the card would need to be able smaller than the envelope's dimension.


For the card base, I cut a brown cardstock sheet down to 6-3/4" x 6-1/4". I then scored it at 3-3/8" to create a clean card fold. I used the score tool to flatten the fold.
Decorating the Card Front


To decorate the card front, I cut a beige cardstock sheet down to 6-1/4" in length and trimmed the width until I was happy with how it looked on the card front. I ended up trimming it down to approximately 2-7/8".

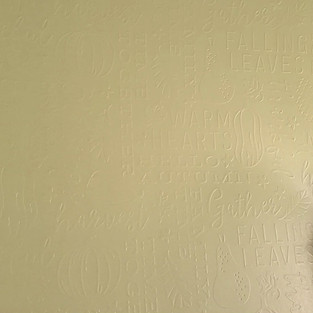


I then selected a green embossed sheet from my Fall Embossed Hot Buy paper pack and cut it down to 6-1/4" x 2-1/2". I intended to place this piece over the beige piece, but I didn't feel like it was easy to see the embossing.


I experimented with stamp ink and markers on a few small green embossed scraps to see if I could make the embossing stand out more. After testing different techniques, I decided to rub green stamp ink over the green embossed piece and wipe off the excess with a paper towel. It made it easier to see the texts and images embossed into the sheet.
I used my permanent double-sided tape runner to adhere the beige piece over the center of the brown card front. I then adhered the stamped green embossed piece over the beige piece.
Decorating the Inside of the Card


I cut another beige cardstock sheet down to 6-1/4" x 2-7/8" to sit inside the card base. Before I adhered it, I decided to stamp a sentiment that read "Thanks To You" with green ink.
In retrospect, I wished I used a simple "Thanks" sentiment and brown ink. I thought the sentiment I used could come across as sarcastic depending on the receiver of the greeting card. The green didn't contrast against the beige as much as I wanted.
I created two more identical cards where I used a different sentiment and stamp ink. I liked how those looked on the inside of the card better, but this card I'm sharing with you now was still a decent card.
I adhered the stamped beige piece centered on the right half of the inside of the card base.
Decorating the Envelope


I used the excess green embossed sheet inside of this envelope. I placed the sheet over the envelope and used my pencil to mark the width I wanted the sheet to be cut down to. The sheet was cut slightly smaller in width than the envelope to ensure it'd fit within the envelope with ease.


I placed the envelope over the sheet to determine where to make a score mark for folding. I did so to make sure that the part of the green embossed piece that went inside the envelope wouldn't prevent the envelope's flap from closing completely.


After I scored and folded the green embossed piece, I ran my permanent double-sided tape runner along the outer edges and center of the envelope's flap. I folded the flap over the green embossed piece to adhere the two together. I cut off the excess around the flap with scissors.


I decided to stamp a sentiment that read "wishing you a day filled with happiness" on the flip side of the envelope's flap with black ink. I've been stamping this sentiment on the back of many envelope's recently because it's a positive message I wish for all who read it.
My Thoughts

This was a simple card to make, probably because the design isn't that different from when I made the Flamingo Greeting Cards a few months ago. This may be my subconscious design of choice when I want to make a card quickly.
What's Next?
My mind's been restless, so I plan to keep myself busy over the weekend. Hopefully, I'll craft something I can share with you next week.
If this post inspired you to make your own greeting card, Login and Sign up to share your creations. I'd love to see and be inspired by your creativity!
If you're interested in future card making posts, subscribe below to be notified when those and other posts are available.
Thanks, and have a great day!
Simply Jelly Jam
Comments