Making a fun fold card to try something new.
I made a fun fold waterfall card using sheets from a Valentine-themed paper pad.
Supplies and Stuff
These are the items I used to make this fun fold waterfall card:
Paper cutter and score tool
Cardstock paper
Decorative pattern paper
Double-sided permanent tape
Hole punch
String
Clear adhesive
Scissors

When it comes to making fun fold cards for the first time, it's not uncommon to make mistakes. After I poorly completed my first attempt, I noted the sizes of the pieces and where to score for folding. I then created a diagram (see above) as a reference for my next attempt (this card).
Preparing the Card Base


I used red cardstock to make an A2 sized greeting card base. I cut the cardstock down to 5-1/2 inch by 8-1/2 inch and scored it down the center at 4-1/4 inch.


I pulled a sheet of pattern paper from my Be My Valentine Hot Buy paper pad and cut it down to two 4 inch by 5-1/4 inch pieces. I adhered one of the pieces to the card front with the pattern side up. I adhered the other piece inside the card with the pattern side down. I was going to have the pattern show inside the card, but I thought a plain white piece would look best.


I pulled a gold sheet from my Embossed Foil paper pad and cut it down to 1 inch by 4-1/4 inch. This piece will hold the waterfall feature in place. I ran tape on the short ends of the gold strip. I needed free space to later slide the waterfall feature into.
Making the Waterfall Feature


I cut red cardstock down to 2 inch by 9 inch. I then scored it at 2 inch, 2-3/4 inch, 3-1/2 inch, and 4-1/4 inch. I folded on the scored lines to make an accordion shape of sorts. This piece will serve as the waterfall feature's base.

I chose to use a sheet of small designs from the Hot Buy paper pad. There were a variety of sizes that would work well on the next few pieces I cut for the waterfall feature.


I cut four squares of paper down to 1-7/8 inch by 1-7/8 inch. I originally wanted these to be 2 inch squares, but I messed up cutting the first square and decided to work with what I did.
I cut out four small designs and adhered them to the four squares I just cut. I wasn't concerned about the exact sizes of the small designs. I trimmed them slightly smaller than the four squares I adhered them to. I wanted the white of the four squares to create a contrasting border.
The small designs I cut out are roughly about 1-5/8 inch design squares in case you're interested.


I cut pattern paper down to 1-7/8 inch by 4 inch. I cut out and adhered a smaller text design to the cut pattern paper strip.


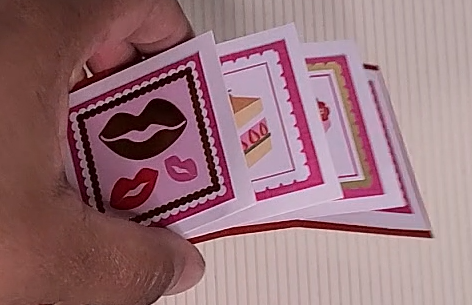
I adhered the four square designs to the part of the waterfall base along the scored lines. One of the square designs fit perfectly within the end of the waterfall base. I then ran tape in between each small, scored areas and adhered an edge of a square design to it. This allowed the square designs to flap like pages of a flip book.


I flipped the waterfall base over and adhered the text design to the long stretch along the score line.

I added a small piece of white cardstock along the text design. This wasn't necessary, but I thought the written word "PULL" would be easier to read on a white background opposed to a red background.
I wrote the word "PULL" and punched a hole. I tied a short string through the hole and drew arrows to indicate which direction the recipient should pull the tab.
I didn't have a pull tab in my first attempt making a waterfall card. I handed the card to my Dad who used his fingers to flip each individual square design. A pull tab is helpful for a recipient who's not familiar with handmade fun fold interactive cards.
Assembling the Card


I slid the text design part of the waterfall base under the gold strip on the card front. I ran tape on the opposite end underneath the first square design that will show on top.
I positioned and adhered the taped end of the waterfall base onto the gold strip. I made sure to burnish it well to prevent it from coming loose and falling apart in the future.
Fixing a Minor Annoyance

Because I layered thick paper to decorate the waterfall base, I struggled to slide it back into place. The text design always snagged on the edge of the gold strip. I realized that a recipient could pull and slide it far enough to make sliding it back into place tricky.


I wanted a recipient to be able to pull and slide it back and forth effortlessly. I removed the string and cut a piece of clear adhesive shelf liner.
I placed the adhesive over the text design and burnished it. I used my fingernails to ensure the edges were adhered well. I trimmed off the excess adhesive, punched a hole once again, and tied the string to the end.
The adhesive allowed for an effortless sliding of the waterfall feature. The text design no longer snagged on the edge of the gold strip.
My Thoughts


This was a fun card to make, but there's room for improvements. It took me between thirty to forty minutes to make this card with breaks for drinks and a Kit Kat bar.
I believe the waterfall feature would be best suited for photo stickers in a scrapbook rather than on a card. Yes, this is fun to interact with, but it requires time, effort, and materials to create a greeting card a recipient may only look at once and put away to be forgotten.
However, if you know someone who appreciates handmade crafts or have personal photos to use in place of reproducible designs, then this would be a fun card to hand make!
What's Next?
I've been working on several arts and crafts projects for fun. Check back next week to see what I share next.
Traditional or interactive? Login and Sign up to share whether you prefer to make or receive traditional or interactive greeting cards.
Don't forget to subscribe below to be notified by email when I post something new.
Thanks, and have a great day!
Simply Jelly Jam
Comments